redhat Paas Lab projects
Lab contents (Click links below):
1) Overview
Key file for Labs:
Please download this link Key file (.pem) (Right click and then save it)
Then you need to generate a private key(.ppk file).
Please refer THIS LINK to generate a private key using puttyGen
In instructions below, the name of this key is "try.ppk"
Instructions:
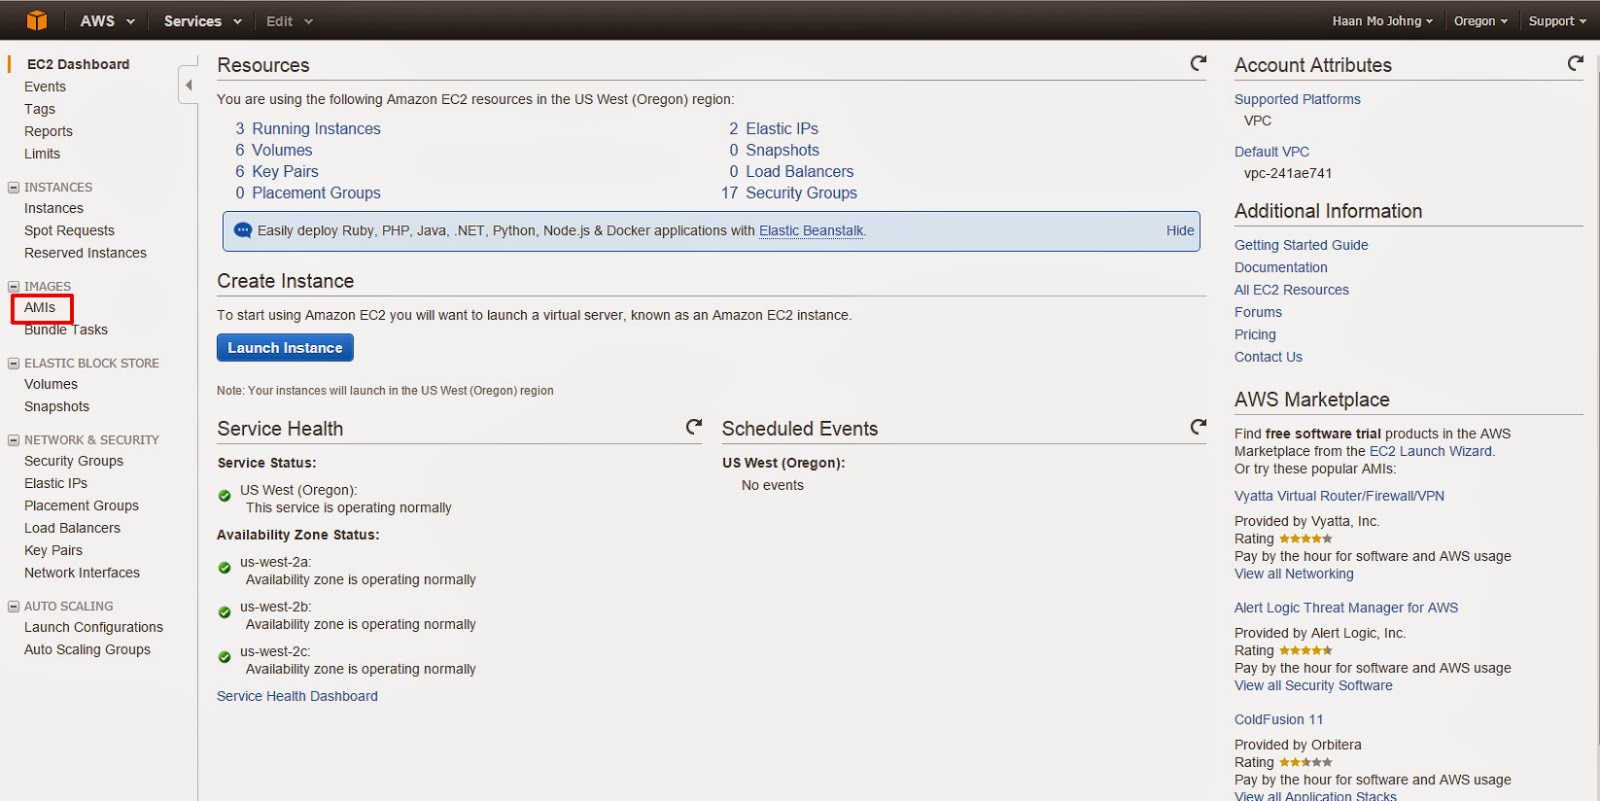
Step 1: Go to AWS EC2 console

Step 2: Click AMIs
Step 3: Click Public images

Step 4: Search "rhar"

Step 5: You can see 3 instaces for lab 1, lab 2, and lab 3

Step 6: Click a box of second instace, click actions, then click Launch
We will create a second instance for Lab 2.
You need to create all three instances for Lab 1~3.

Step 7: Click Review and Launch

Step 8: Click Launch

Step 9: Click Proceed without key pair
*This is important step. Do not create a new key pair or choose an existing pair

Step 10: Click a box then Launch instances

Step 11: Click view instances

Step 12: An instance is created and you got Public IP.
*Remember your Public IP. You need to wait for the instance initiating.

Step 13: Open Putty and write Host with root Name and write Session name
Please use root. Check your public IP at step 12.

Step 14: Click Auth on left layer, click browse, then load "try.ppk" file.,

Step 15: Click Session, save your session, then click Open

Step 16: Click Yes

Step 17: Now you can access to your instance for Lab 2.

Step 18: For test purpose, type some commend.

Step 19: Repeat this process for Lab 1 and Lab 3 also.
Step 20: Now you are ready to follow lab instructions.
Please follow remaining steps on each labs
댓글 없음:
댓글 쓰기